There are many ways to make your walls and ceilings more resistant to damage, but one of the most popular methods is to use the resilient channel. the channel is designed to be installed between the studs in your walls or ceiling. But how can you do that?
According to the report of the National Institute of Standards and Technology(NIST), the resilient channel was developed to help improve the performance of drywall during an earthquake.
The channel is designed to help dissipate energy and reduce movement between the studs. It can also help to reduce the amount of noise that is transmitted through your walls and ceilings.
It is not uncommon for walls and ceilings to crack or break during an earthquake, but the resilient channel can help to reduce the amount of damage that is caused by the shaking.
That’s why you need to completely read this article. Because in this article I have shared a resilient channel review guide. It will help you to know that should you use the resilient channel for your wall or ceiling or not?
Also, I have covered how you install a resilient channel on a ceiling or wall. If you want to know about that, then keep reading this article till the end.
So, Let’s get started.
Table of Contents
What is a Resilient Channel?
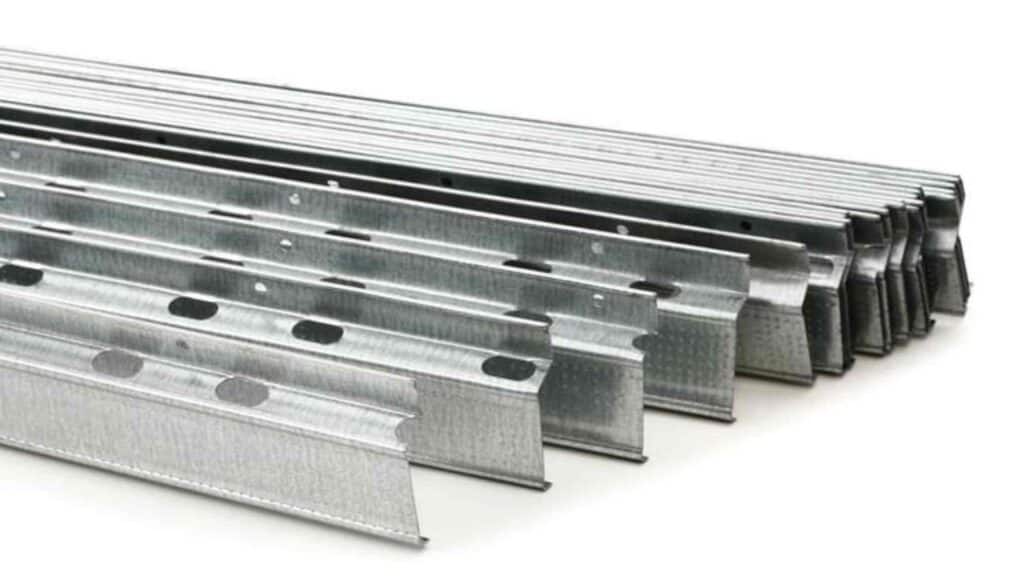
A resilient channel is a thin metallic strip with a pre-drilled hole on it that is easy to screw against an existing wall or stud or any hard surface. It is also known as the RC or Z channel.
If you are planning to install any additional layer on top of the existing wall the best solution is to use the resilient channel.
It separates the existing wall with any additional layer installation, so in between this it can create a decoupling zone where the noise or soundwaves can be trapped easily.
You can get an easy idea of what is a resilient channel from the explanatory video.
Resilient channel is of different types, where few of them are single-leg however others are two-leg.
Here legs mean the width and number of holes available to drill against the wall.
Few channels are having only a single series of holes however others is having two parallel series of holes that fix best against the wall and are stable enough as compared to the single-leg channel.
While considering the size of the channel then ideally it will be between 1/2″ in-depth and 8 feet long and you can go with higher than this based on your required uses.
Now you may be thinking of how effective is a resilient channel and why you should use it, so let focus on the same to get you more ideas.
How Effective is a Resilient Channel should I use it?
While soundproofing any house or room and planning to implement various techniques then the very big area which you are concerned enough is how to soundproof a wall or door or ceiling and in all cases, the best-suggested solution is covering the existing setup with an additional layer but why?
If you have gone through our previous lesson where we discussed the different principles of soundproofing, sound-absorbing, and sound dampening such as
SoundProofing – It is the key technique where our primary focus is to block the sound and stop it from further transmission.
Sound Absorbing– Sound Absorbing’s primary focus is to absorb the soundwaves and improve sound quality.
Sound Dampening – While working on dampening then our primary focus is to minimize the vibrations and reduce the resonance.
Decoupling– Probably this is the major area where our focus is to change the medium for sound transmission, so it gets slowed down and dissipates energy, and reduces the further vibration or transmission of the sound waves.
Out of the four principles the resilient channel helps to achieve decoupling which reduces the airborne noise coming from the other side of the wall or ceiling.
In addition, if you have heard the concept of a room inside a room that is also possible by the use of the resilient channel, Let me explain how it works?
Let’s say you are struggling with the noise coming from the neighbor due to the poor quality of the wall then the best solution to block the noise is to set another layer on top of the existing wall.
Wich can be done by simply screwing the drywall layer directly onto the existing wall but it is not recommended.
As if there is any vibration on the other side of the wall your existing drywall will also start vibrating and no sense to have such a setup but resilient channel help to separate out both walls from each other.
In the detailed guide of noise, we learned how noise transmits from one place to another, and in summary, I must say it travels faster in solid as compared to air or vacuum, so why not create a barrier to the environment by setting up a resilient channel.
First screwed resilient channel on top of existing wall and now on top of resilient, screw the drywall and in such a way you can create great isolation for the noise by setting decoupling zone.
Now when noise coming from the other side of the solid wall passes through the air or vacuum then it slows down and dissipates energy and later then pass through the drywall.
Just for the recommended suggestion, on your top layer of drywall, you can use mass-loaded vinyl (MLV) which blocks the noise on the drywall itself.
You have heard about Sound transmission class (STC) or Impact insulation class(IIC).
Both of these ratings explain the ability of any material to block the sound transmission or impact noise, hence resilient channel helps to improve the STC score or IIC of your existing wall or ceiling.
Now you got an idea of how effective is a resilient channel and why you should use it in soundproofing, let me get you a few more ideas on how a resilient channel is different than hat channel and sound isolation clip.
Resilient Channel vs Hat Channel vs Sound Isolation Clip
A resilient channel is no doubt an effective solution to reduce the noise but it is not the only solution to create decoupling, there are various others and in this list, the two well-known are the resilient Hat channel and sound isolation clip.
Till this point, we learned that a resilient channel is directly screwed against the wall and on top of that you can set the drywall or any additional isolation layer like plasterboard, etc.
But the use of the Hat channel has additional advantages.
What is Hat Channel?
A hat channel is used with a sound isolation clip, where on the existing wall first the isolation clip will be added and the hat channel is clamped inside the isolation clip and then you can set your additional layer like drywall or plasterboard.
Here the advantage is, that this time noise has to go through the additional layer of sound isolation clip then the Hat channel, and then the final top layer which increases the decoupling zone and it is simple to understand that the larger the decoupling zone more energy dissipation.
But even using resilient channels and setting up green glue in between the layer of walls can also dissipate most of the noise or energy, and can achieve the same level of noise reduction so it is all up to you which approach you to want to opt for.
Well, till this point I consider that you are confident about what is a resilient channel, how effective it is, and why you should use it.
So let me get your best resilient channel and hat channel which are effective enough for your noise reduction objective.
Best Resilient Channel and Hat Channel and Sound insolation clip
I believe you are sure, now which one you want to purchase but here is some pre-buying guide to assure you, that whatever you are purchasing is an exact match with what basic resilient channels need.
Buying Guide for Best Resilient Channel
Here are a few points you should always check:
- Length: Ideally resilient channels are 8 feet long.
- Gauge – Ideally every resilient channel is made of 20-25 gauge steel metal.
- Depth – It is a key point that decides what airgap it will create so ideally it should be in the range of 1/2″.
- Density – It will decide the hardness of the channel so try to get one that is denser so it can easily be screwed with the wall.
- Price – The price matters for the quality, the more you spend the more quality you will get.
The depth of the resilient channel is half as compared to the Hat channel due to the extra layer of sound isolation clip but the results are quite similar.
So let’s discuss the best resilient channel.
Best Resilient Channel for Wall or Ceiling
Let’s first discuss the best available resilient channels which fulfill our need and as we learned earlier, it does not need a sound isolation clip.
So will just go through the best that people are buying and experiencing with a positive review.
1. Auralex RC-8 Resilient Channel
It is a one-leg resilient channel manufactured by a well-known acoustic manufacturing company called Auralex Acoustic which meets your all best requirement.
It is made for the same reason to hang the drywall instead of attaching them directly to the wall where this best resilient channel is 8 feet long 25 gauge ideal channel which strongly creates isolation for sound transmission from the wall.
Here are listed features of the RC-8 channel.
- Length: 8 Feet
- Gauge: 25
- Material: Steel
- Air Pocket: 1/2″
This resilient channel is ideal for your need where it is long and dense enough to fix against the wall creating the required air gap for an ideal decoupling zone.
This product is ideally used in your bedroom, office, or private space for wall or ceiling soundproofing.
The box you purchase will have a total number of 24 pieces and each piece will be an 8-foot long resilient channel. Here they offer two sets of products one is RC-8 and the other is RC-1, so I recommend having RC-8 as it is wider and dense enough to work and install perfectly.
RC-8 should be installed horizontally at the bottom or top of the wall for correct installation and they are claiming that around 2 layers of drywall with each 5/8″ with an additional layer of sheet block can be hung on the RC -8 resilient channel.
I believe in Amazon sellers and that is why I checked the customer review of Auralex RC-8 Channel and then I suggested here but I advise you to search more in case you are looking for something different.
No products found.
2. Trademark RC-1 Resilient channel
Well, the previous choice was in case you are looking for RC-8 Resilient channel however in the same list resilient channel manufactured by Trademark soundproofing is very famous which is one leg RC-1.
It will be your low-cost efficient solution to reducing sound transmission in both steel and wooden partition. This resilient channel will be having a pack of 32 pieces with a length of 8′ each.
While checking the features here we have the highlights:
- Dimension: 2.0″ W x .5″ D x 96” L
- Gauge: 25
- Material: Steel
- Air Pocket: 1/2″
Like another channel, it does not require a sound isolation clip that can directly drill against the wall. It can hold two layers of drywall with each weight of approx 1.6lb.
As I suggested, if you are looking for a cost-effective solution then only you should choose RC-1 instead of RC-8. This is mainly designed for the wall and will do its job of blocking the noise.
No products found.
Best Hat Channel and Sound Isolation Clip
Probably there are very limited choices to find out the best but I have gone through a few to get the best out of them and here we have our best findings.
1. Hat Channel by Trademark Soundproofing
They provide a 2-leg Resilient hat metal channel with 25 Guage metal quality which works with all standard sound isolation clips.
This channel is designed to easily hold two-layer of drywall with a 5/8″ size each. This is available in a bundle of 20 pieces with a length of 8.6′ each which is good enough for ceiling soundproofing.
Here are features listed for the Hat Channel.
- Length:8.6′
- Gauge: 25
- Material: Steel
- Air Pocket: 7/8″
Remember the Hat channel snaps into the clips so always recommend having a set of clips and it is never recommended to drill through the Hat channel, which indirectly reduces its isolation property.
Well, it is up to you which one you want to implement resilient or Hat channel but Trademark manufactured resilient Hat channel I found the best among all the Amazon available products.
No products found.
2. Resilient Sound Isolation Clip by Trademark
A resilient sound insulation clip is also known as RSIC which helps to improve the STC score of the partition.
Here the best one is manufactured by Trademark Soundproofing where you will get a set of 10 RSIC-1 clips plus 10 screws and an installation guide at an affordable price.
It is far better to use Wood, steel, concrete wall or ceiling, or floor purpose. Where it claimed to gain an additional 15 STC as compared to just use of the resilient channel.
Here are the highlights.
- Pieces: 10
- STC Improve: 15
- Ideal fit size of the Hat channel: 7/8″ depth and 2.5″ wide
Well, as to use resilient Hat channel, it is primary need to have Sound clips and an approx if you want to cover 250 sq foot area with 10″ wall then probably you will need around 150 clips for your 4 walls which around 65*10 feet in dimension, so better to check their specification guide.
Where few people also suggested using it with MLV to the stud and then on top of that you can set it to this RSIC.
Most product recommended by users is from Amazon only so better to check from your side for your required specification.
No products found.
Well, I imagine till this point you have learned a lot about Resilient channel, Hat resilient Channel, and sound isolation clip and their best available.
So let before closing this detailed guide, I will brief you on how to install resilient channels as we are more focused on Resilient channels instead of Hat Channel.
How Do You Install a Resilient Channel on a Ceiling or Wall
Well buying the right product is the primary part but how it is effective in sound isolation or noise reduction will totally depend on how accurately you install a Resilient channel.
For your quick Recap on the Installation of the channel on the ceiling, you can also take help from the below video.
So let’s discuss the key factors you should aware of otherwise your whole setup will be worthless and you won’t get that much advantage from your investment.
Step 1st: Identify the Best place to the Stud
Probably if you can view the stud or joist then you can directly drill the Resilient channels against it by using a screw but what if you can not view this then the very first thing is to remove your existing drywall to get up to the stud.
Once you are close to stud then examine the best possible outlet of noise and plan your electric boxes and wire cables accordingly.
Well after removing drywall, you will have spaces in between the studs or joist, so for proper isolation of sound, I advise filling this with soundproof insulation materials.
Step 3rd: Drill your channel against the wall or ceiling
- The resilient channel will be mounted at the right angle to the stud while fixed against the wall or ceiling. Well in the case of the wall make sure all the narrow flanges should be at the bottom and the larger ones will be at the top.
- Find out the center spot of the stud to drill accurately to the resilient channel.
- While installing a resilient channel, make sure it has an intersecting surface of around 1/4″ on the side edges and 4-6″ from the top and bottom of the wall.
- Take help from a person while drilling a resilient channel against the stud otherwise, you may lose the linear fixing and maybe unnecessary holes on the walls.
- If working on the wall then Stud will be verticle so position the resilient channel horizontally however on the ceiling it will be vertically so better to use a ladder for hassle-free installation.
Step 4th: Set Layer of Drywall on Resilient Channel
- Essentially, you have already decided you want to fix the thick soundproof drywall to the resilient or want to have sandwich drywall with green glue.
- Soundproof drywall has an STC score of more than 50, so you won’t need green glue for the same however you can create a sandwich of drywall using green glue.
- This time is to hang drywall near resilient channel and mark points on the drywall sheet which ensures you are making holes in the right place,
- Now simply drill the screw through drywall and then resilient channel and make sure it won’t cross the stud else will create a direct connection with the primary wall and it will be less effective.
- Well, if you have done this installation that means this time is to cover your wall with an additional blocker which is optional.
Additional Tips
- If you are expecting more improvement in sound insulation then it is advisable to use Mass loaded vinyl on the stud prior to drilling the Resilient channel and on top of the Drywall which ensures the additional density or mass of the wall and blocks the noise coming from the other side.
- Use Green glue in between the primary and secondary wall due to its viscous nature it dissipates all sound energy into heat and causes less transmission of the noise.
Here is the end on Resilient channels and their best available products in the market, how effective it is, and why you should use them at the end, we also learned how to install sound insulation clip, resilient channel, and drywall perfectly.
Wrap Up On Should I Use Resilient Channel?
Well, there is nothing to say about the resilient channel as we have already gone through a lot but in summary, I must say if you are struggling with impact noise from the ceiling or airborne noise from another side of the wall then it is better to install resilient channels.
If you are able to create decouple zone using resilient channels then definitely you are reducing the noise quality and almost every person uses it especially to soundproof a wall or ceiling.
I advise using soundproof drywall which will be thicker as compared to normal drywall and if you do not have any then better to create a sandwich of the thin layer drywall for effection isolation.
If you have used any of the above ones, then share your experience with our readers so they can plan their future buy accordingly.
FAQ: Resilient Channel Buying Guide
Many people have many questions related to the Resilient Channel. Here I am giving you answers to some important questions.
Q1. Is resilient channel worth it?
Ans: Resilient channels are the best cost-effective solution to reduce noise and a great choice to create a strong barrier to noise. Because of their price, they are the best way to reduce noise in your home.
Q2. How much does a resilient channel cost?
Ans: Average price for the RC-8 resilient channel with 25 gauge will be around $150. But the price may vary depending on the brand, durability, and thickness.
Q3. How much does it cost to install a resilient channel?
Ans: Average cost for the installation of the Resilient channel would be around $1 per square foot. Because the product is quite light and easy to install, the price for the installation is quite low.